Pegasus™ H7 Projector Angel Eye Conversion & GiSi™ HID Kit
INSTALLATION
Download: ===> PDF
 Pegasus headlight Conversion & GiSi HID |
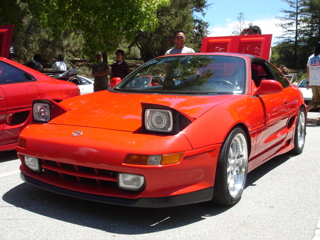
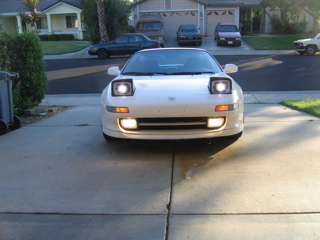
 OEM MR2 lighting (Before) |
 OEM MR2 lighting (Before) |
 OEM MR2 lighting (Before) |
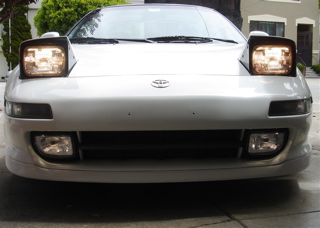 OEM MR2 lighting (Before) |
 OEM MR2 lighting (Before) |
 OEM MR2 lighting (Before) |
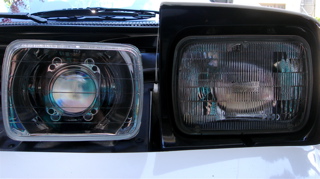 Comparing: Pegasus versus OEM MR2 lighting |
 Pegasus & GiSi HID components (Close Up) |
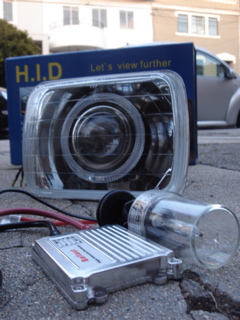 Pegasus & GiSi HID components (Close Up) |
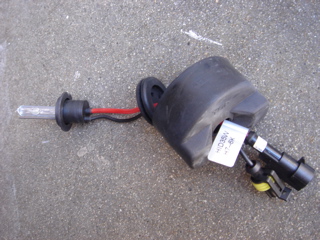
 GiSi HID Super Thin Ballast & HID bulb (Close Up) |
 GiSi HID bulb & connector plugs (Close Up) |
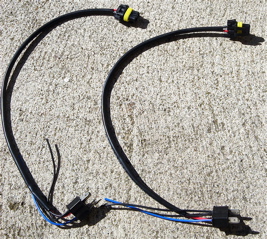 H4 adapter wires (One end to ballast other end to OEM MR2 factory harness H4 plug) |
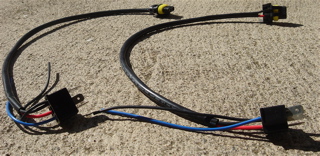 H4 adapter wires (One end to ballast other end to OEM MR2 factory harness H4 plug) |
 H4 adapter wires (One end to OEM MR2 factory harness H4 plug & other goes to the ballast) |
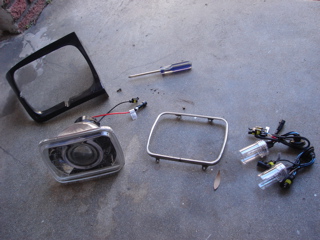 Lay out your parts & Tool (Phillips Screwdriver) |
 Use the Philips screwdriver to remove the 4 screw on the black shroud |
 Use the Philips screwdriver to remove the 4 screw on the black shroud |
 What it looks like after you removed: Black shroud, aluminum trim, OEM glass |
 What it looks like after you removed: Black shroud, aluminum trim, OEM glass |
 What it looks like after you removed: Black shroud, aluminum trim, OEM glass |
 Remove the aluminum trim which supports the glass headlight: (4 screws = same Phillips screwdriver) |
 Remove the aluminum trim which supports the glass headlight: (4 screws = same Phillips screwdriver) |
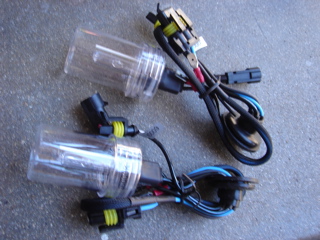 GiSi HID bulbs: (One per headlight housing) |
 Unscrew the plastic casing that protcts the bulbs in shipping: (cover, cap, washer, bulb) |
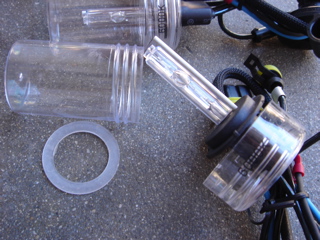 Unscrew the plastic casing that protcts the bulbs in shipping: (cover, cap, washer, bulb) |
 Feed the HID bulb wirethrough the Pegasus rear rubber boot hole: (NEVER touch HID bulb glass. HOLD @ black base) |
 Feed the HID bulb wirethrough the Pegasus rear rubber boot hole: (NEVER touch HID bulb glass. HOLD @ black base) |
 Feed the HID bulb wirethrough the Pegasus rear rubber boot hole: (NEVER touch HID bulb glass. HOLD @ black base) |
 GiSi HID bulb fits into the bulb slot behind each Pegasus headlight housing: (NEVER touch HID bulb glass. HOLD @ black base) |
 Secure the bulb down with the prong hinge latch lock: (NEVER touch HID bulb glass. HOLD @ black base) |
 Secure the bulb down with the prong hinge latch lock: (NEVER touch HID bulb glass. HOLD @ black base) |
 Squeeze the circular rubber grommit through the rubber boot hole (as shown) |
 Trickle boot alongside the wires toward the bulb's base & fit the boot hole over the bulb's base's circular perimeter |
 Use Electric Tape to help seal off weathering (Around the circular rubber boot & angel eye wire opening) |
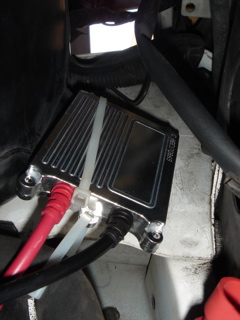
 Mount the ballast alongside the OEM factory wiring loom Make sure it's tight & does not vibrate loose (Use zip ties though the 3-4 ballast mounting holes) One ballast for driver side One ballast for passenger side |
 Mount the ballast alongside the OEM factory wiring loom Make sure it's tight & does not vibrate loose (Use zip ties though the 3-4 ballast mounting holes) Bird's Eye View One ballast for driver side One ballast for passenger side |
 Mount the ballast alongside the OEM factory wiring loom. Make sure it's tight & does not vibrate loose (Use zip ties though the 3-4 ballast mounting holes) Lying under car looking up One ballast for driver side One ballast for passenger side |
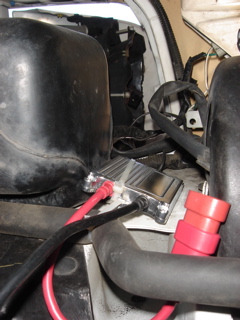 Mount the ballast alongside the OEM factory wiring loom Make sure it's tight & does not vibrate loose (Use zip ties though the 3-4 ballast mounting holes) Lying under car looking up One ballast for driver side One ballast for passenger side |
 Mount the ballast alongside the OEM factory wiring loom Make sure it's tight & does not vibrate loose (Use zip ties though the 3-4 ballast mounting holes) Lying under car looking up One ballast for driver side One ballast for passenger side |
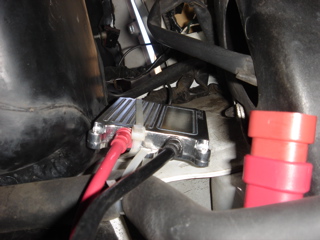
 Mount the ballast alongside the OEM factory wiring loom Make sure it's tight & does not vibrate loose (Use zip ties though the 3-4 ballast mounting holes) Lying under car looking up Picture shown above taken from installation for HID headlights & HID foglight. Thus, two ballasts per side. (Only for customers who purchased HID headlight & HID foglight) |
 Mount the ballast alongside the OEM factory wiring loom Make sure it's tight & does not vibrate loose (Use zip ties though the 3-4 ballast mounting holes) Lying under car looking up Picture shown above taken from installation for HID headlights & HID foglight. Thus, two ballasts per side. (Only for customers who purchased HID headlight & HID foglight) |
 |
 |
 |
 |
 |
 |
 |
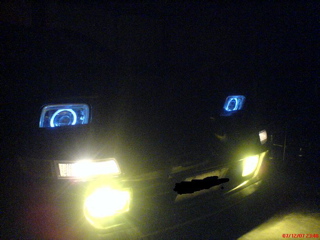
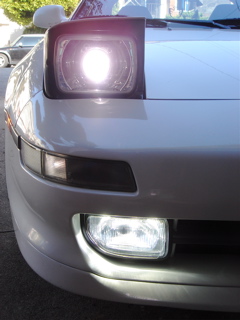
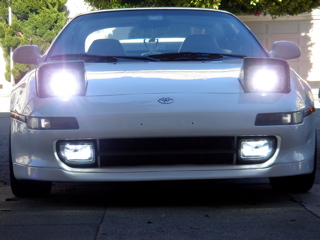
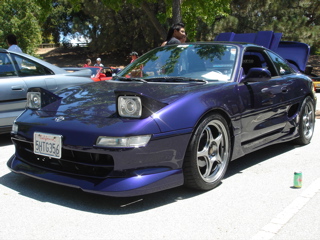
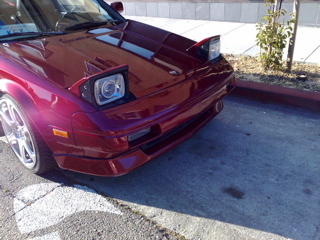
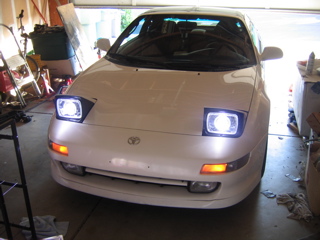
 Pegasus conversion kit & GiSi HID kit installed |
 Pegasus conversion kit & GiSi HID kit installed |
 Pegasus conversion kit & GiSi HID kit installed |
 Pegasus conversion kit & GiSi HID kit installed |
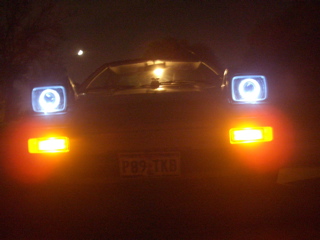
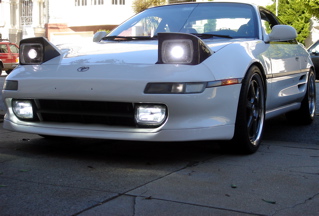
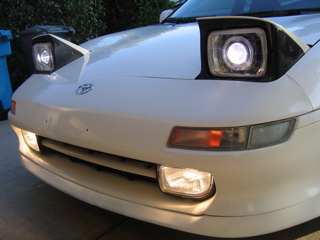
 Pegasus conversion kit & GiSi HID kit installed (Passenger side) |
 Pegasus conversion kit & GiSi HID kit installed (Driver side) |
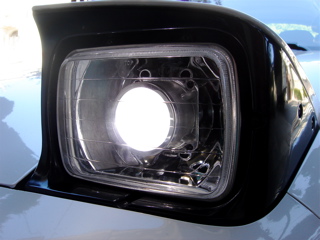 Pegasus conversion kit & GiSi HID kit installed (Driver side) |
 Pegasus conversion kit & GiSi HID kit installed (Driver side) |
 Pegasus conversion kit & GiSi HID kit installed (Driver side) |
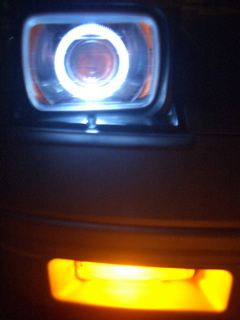
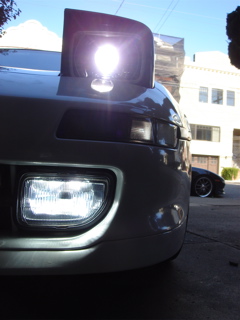
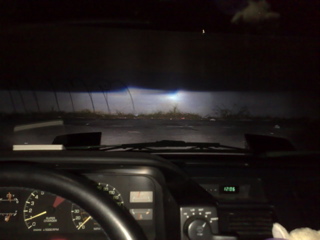
 Pegasus conversion kit & GiSi HID cutoff-line for aligning your output (Use Philips screwdriver per OEM ajduster screw on headlight ) |
 Pegasus conversion kit & GiSi HID cutoff-line for aligning your output (Use Philips screwdriver per OEM ajduster screw on headlight ) |
 Pegasus conversion kit & GiSi HID cutoff-line for aligning your output (Use Philips screwdriver per OEM ajduster screw on headlight ) |
 Pegasus conversion kit & GiSi HID cutoff-line for aligning your output (Use Philips screwdriver per OEM ajduster screw on headlight ) |
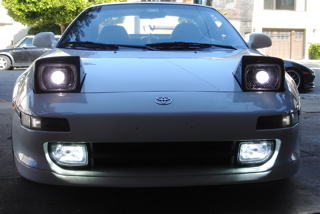
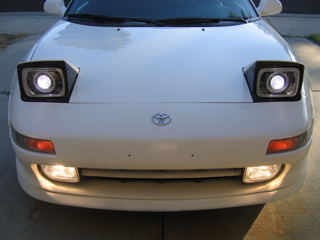
 Pegasus conversion kit & GiSi HID kit installed |
 Pegasus conversion kit & GiSi HID kit installed |
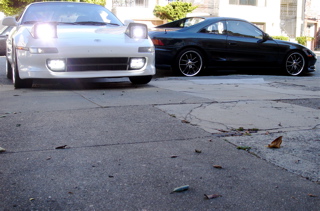 Pegasus conversion kit & GiSi HID kit installed |
 Pegasus conversion kit & GiSi HID kit installed |
 Pegasus conversion kit & GiSi HID kit installed |
 Pegasus conversion kit & GiSi HID kit installed |
 Pegasus conversion kit & GiSi HID kit installed |
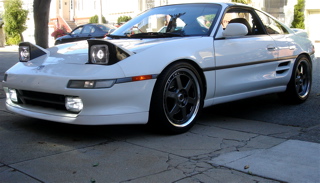 Pegasus conversion kit & GiSi HID kit installed |
 |
 |
 |
 |
 |
 |
 |
 |
 |
 |
 |
 |
 |
 |
 |
 |
 |
 |
 |
 |
 |
 |
 |
 T-Taps to connect angel eyes to sidemarker lights |
 T-Taps to connect angel eyes to sidemarker lights |
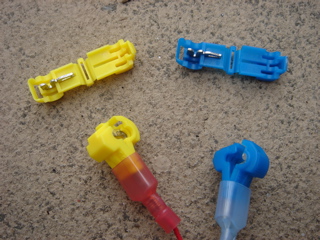 T-Taps collapse & slide in to each other as an all-in-one terminal |
 T-Taps collapse & slide in to each other as an all-in-one terminal Bites into OEM sidemarkers |
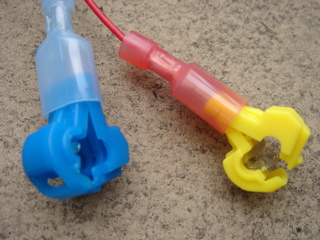
 T-Taps to connect angel eyes to sidemarker lights Bites into OEM sidemarkers GREEN = Positive WHITE = Negative |
 T-Taps to connect angel eyes to sidemarker lights Bites into OEM sidemarkers GREEN = Positive WHITE = Negative |
 T-Taps to connect angel eyes to sidemarker lights Bites into OEM sidemarkers GREEN = Positive WHITE = Negative |
 T-Taps to connect angel eyes to sidemarker lights Bites into OEM sidemarkers GREEN = Positive WHITE = Negative |